|
|
Cape Haze QuiltingFine Thread Designs |
Embroidered quilt labels
Labeling a quilt is far more important than announcing that you made a quilt. A quilt label is an important resource for future generations and ensures that wherever the quilt goes, its provenance is clear. In my twenty years of quilting, I have often heard, sadly, "I don't know who made this quilt." Don't let that happen to your quilts!
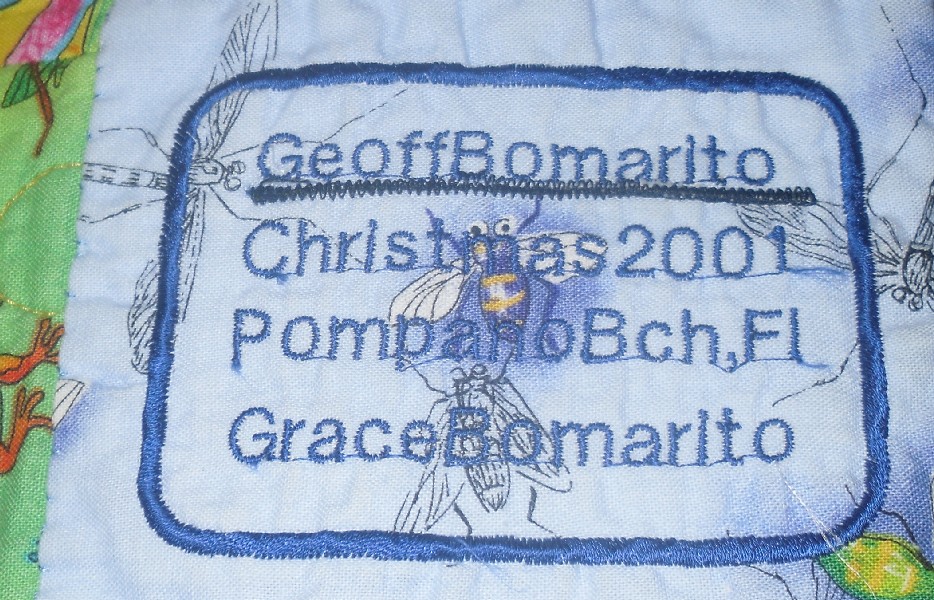
 A quilt label
should include the following information: The first line should be
the full name of the quilt maker, including maiden name. If someone
other than the maker did the quilting, add that. The next line should
provide the town, state, and possibly the country where the quilt was
made. Finally, include the date (or an approximation) that the quilt
was made.
A quilt label
should include the following information: The first line should be
the full name of the quilt maker, including maiden name. If someone
other than the maker did the quilting, add that. The next line should
provide the town, state, and possibly the country where the quilt was
made. Finally, include the date (or an approximation) that the quilt
was made.
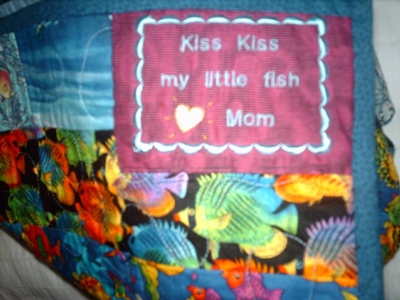
In addition, you can add optional pieces of information.
If the quilt was a gift, add the recipient's name and the occasion for which the quilt was made,
such as a graduation or wedding. Another nice touch is to state the
relationship of the owner to the maker, such as grandmother or aunt.
You can include a saying like, "When this you see, remember me." Books
of quilting quotations are available at your local quilt shop.
Just let us know:
- size of the label
- content : your name etc. as mentioned above.
- color preference
- graphic preference, eg.Scalloped or Heart or whatever you think suits
Quilt labels make thoughtful gifts for your quilting friends! While you're making one for yourself, buy a generic, blank one or two and tuck them away to insert in to a birthday card, for your guild's president's retirement, or for that next quilt.
Binding your quilt
For a stronger binding, we make continuous bias (rather than straight grain) strips. When cut on the bias the fabric strips are more flexible and hold up better over time. Bias binding wears well with use because the stress on the thread is more likely to affect only a small area since the straight of grain does not follow the length of the quilt. Many quilters prefer bias binding for large quilts.
A Couple Little Extra Tips:
- If you are doing a quilt which will be in a show that is judged, finish the binding by hand with small stitches that cannot be seen. Sew the binding to the front of the quilt and bring the binding around to the back for finishing.
- If this quilt will be laundered many times, or you don't want to do hand stitching, finish by machine topstitching. If finishing it this way, you may want to sew the binding on to the back of the quilt and then bring the binding around to the front of the quilt and top stitch on the front. Match your threads in the top to the binding and in the bobbin to the backing fabric.
- When you want to give your project a warm cozy feel, try a plaid or striped fabric, rather than a plain or print fabric, for your bias binding.
Binding Options provided:
- Full Binding hand whipped - The best
- You supply the fabric and we will make, machine sew to quilt front and hand whip down on the back.
- Full Binding all by machine
- You supply the fabric and we will make, attach and finish all by machine.
- Make and Attach
- You supply the fabric and we will make machine sew to quilt front so that you can hand whip down.
- Make only
- You supply the fabric and we will make the bias binding for you to attach.
| Quilt Size | Length of binding | Fabric Needed |
|---|---|---|
| Crib/ Lap | 5-6 yards | 1 yard |
| Twin | 9 yards | 1 1/4 yard |
| Full/ Double | 10 yards | 1 1/2 yard |
| Queen | 11 yards | 1 3/4 yard |
| King | 12 yards | 2 yard |
Border Tips:
- Straight borders cut along the length of the grain (parallel to the selvage edge) lay much flatter than those cut cross grain.
- Remove the selvage edge.
- Avoid handling your quilt by the borders once it has been attached. This can cause them to become wavy due to stretching.
- The first step before sewing the border to your quilt is to take accurate measurements. Be sure to measure through the quilt center, not along the edges, since they may have stretched.
- If you want curved corners or scalloped edges, please wait to cut the curves until after the quilting is done.
- Machine quilting will not correct excess fabric in borders and blocks.
- We can not correct tops that have ripples or uneven borders.

|
Copyright © capehazequilting.com All rights Reserved 2013-01-31 |
May all your ups and downs be with a needle and thread
Author unknown |